This post may contain affiliate links. Please read our disclosure policy.
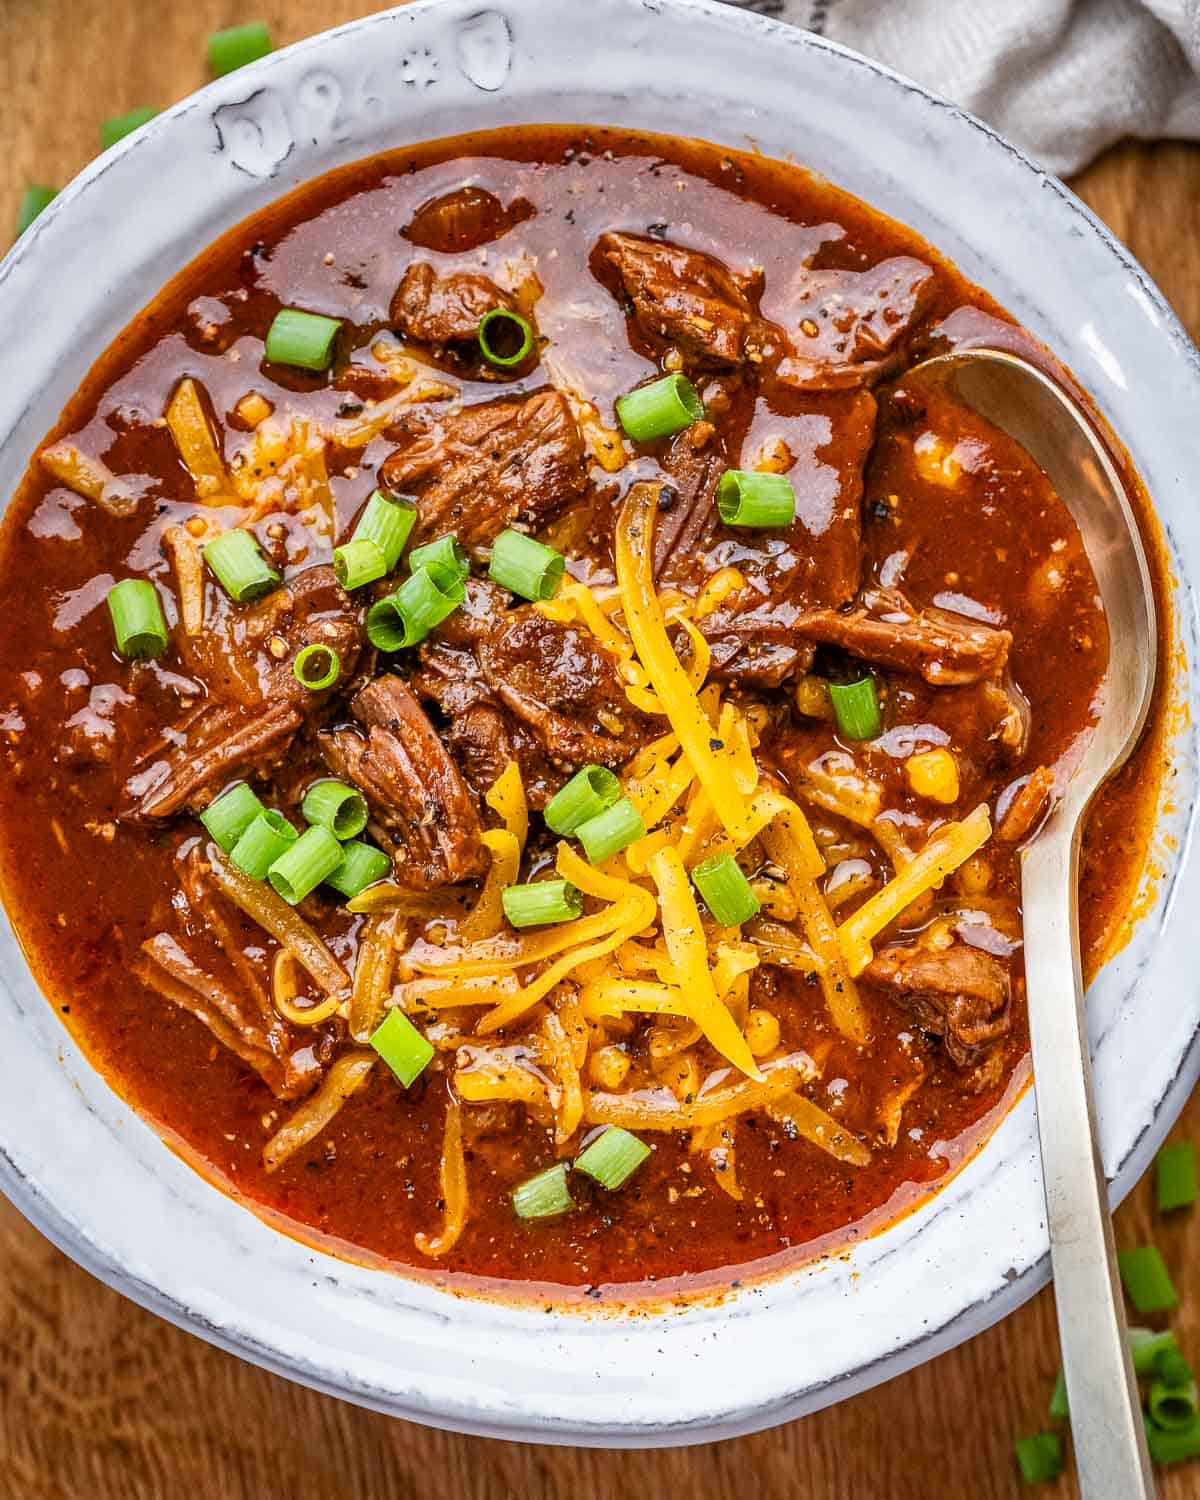
This Texas Chili will become your new favorite, with slow-cooked chunks of beef, a richly spiced sauce, and, most importantly, no beans! Perfect for a weeknight dinner.
While I do love a quick chili made with beans and ground beef, this Texas Chili (a.k.a. bowl of red) is one which takes a bit more time but is so worth it. By braising chunks of chuck beef in a spicy sauce for a few hours, the meat falls apart and infuses the chili with a much richer, beefy flavor than you’d get from ground meat. While traditionally a Texas chili doesn’t include tomatoes, I’ve added tomato puree here for a more rounded flavor. It’s a delicious, deeply flavored recipe that’s perfect for the colder months.
The best part with chili? Everyone can add their own toppings to customise to their taste – a sprinkle of shredded cheese and some sliced green onions are my go-tos.
For more delicious chili recipes, try my recipes for Easy Chicken Chili and Classic Beef Chili.
Recipe Overview
Before You Get Started
- As this recipe takes a few hours to simmer, make sure you give yourself enough time to make it that day so that you can ensure the beef is falling apart by the time you come to shred it. Better yet, make it ahead of time – you can guarantee you have enough time to cook the beef and the chili tastes even better after it has sat in the fridge overnight!
- Searing the beef chunks in batches is key to getting a nice golden crust on the meat. If you overcrowd the pan when doing this, the beef will steam and won’t infuse such a deep flavor into the chili.
- While the chili is simmering, you can add a bit more liquid (water or broth) if you notice it’s looking a bit too dry. It’s important for there to be enough liquid in the pot so that the meat can cook properly.
- Choose a large, heavy-bottomed pot for this recipe so that it evens out the heat and stops the stew from catching and burning as it simmers.
Common Questions
Texas chili is all about hearty, slow-cooked beef simmered in a bold, flavorful sauce made from dried chiles. You won’t find any beans here, and traditionally, no tomatoes either. Just a rich, smoky flavor in every bite
Beef chuck is best for making Texas chili as it is perfect for stewing. This cut is full of flavor but can be tough unless it’s cooked for a long period of time, which allows the collagen and connective tissue to break down, making the meat fall apart, as it does in this dish.
You can add a variety of toppings and sides such as shredded cheese, fresh chopped cilantro or green onions, diced avocado and tortilla chips. I like to serve it with some wedges of lemon or lime on the side to add a bit of a fresh kick to the chili.
Yes! This chili freezes really well. Allow it to cool completely to room temperature then transfer to an airtight container. Freeze for up to 3 months.
Ingredients Needed
Below are the ingredients you’ll need to make this Texas Chili. Full quantities can be found in the recipe card further down the page.
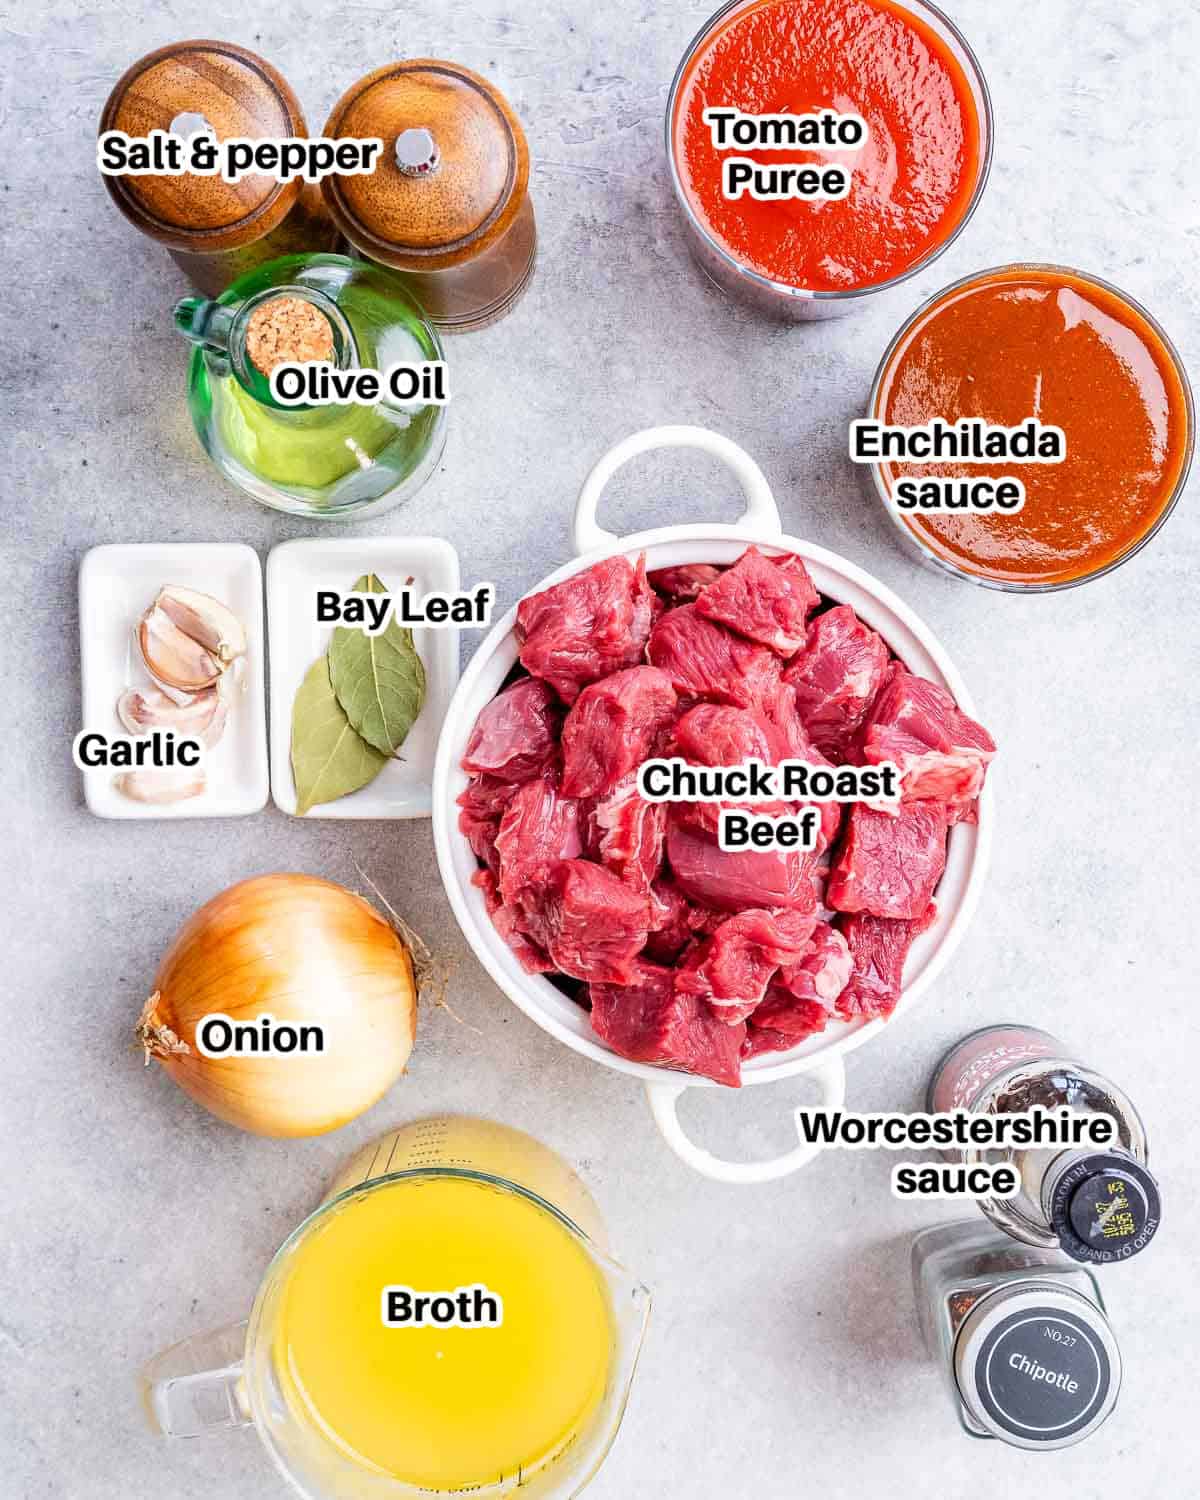
- Beef chuck roast: Beef chuck is the perfect meat to use here, as it’s ideal for stewing – full of flavor but can be tough if not cooked for long enough. As the beef has plenty of time to braise in this recipe, chuck is the way to go.
- Kosher salt and pepper
- Olive oil: You can use avocado oil if you prefer.
- Yellow onion: This brings some sweetness and complexity to the sauce. You could use a red onion in a pinch!
- Garlic: It’s best to use fresh garlic here, but you could use 1 tsp garlic powder if you don’t have fresh. If using garlic powder, add it in the step with the chipotle powder.
- Chipotle powder: The smoky, rich flavor of the chipotle isn’t too spicy. You can use 1 tsp if you don’t like things too hot, or 2 tsp for more heat.
- Enchilada sauce: I used a mild, Tex-Mex style enchilada sauce here. You can go for a spicier version if you like.
- Tomato puree: While this is not always found in a Texas-style chili, I like how it rounds out the flavor of the beef. You can use fresh tomatoes instead if you wish, but just puree them first.
- Worcestershire sauce: This is full of umami flavor and makes the stew taste meatier. If you don’t have any, you can leave it out or even try using soy sauce instead.
- Beef stock or broth: A high-quality beef broth will make all the difference here, as it comprises so much of the sauce. You could also use chicken broth, but the chili won’t be as rich.
- Bay leaves: These have a slightly sweet fragrance that lifts the flavor of the chili. Fresh bay leaves are more flavorful, but you can also use dried.
- Toppings: Make this chili your own by adding whatever toppings you like most. I go with shredded cheese and sliced green onions.
How to Make Texas Chili
Here’s how I made this Texas chili and some tips for you to get it right the first go.
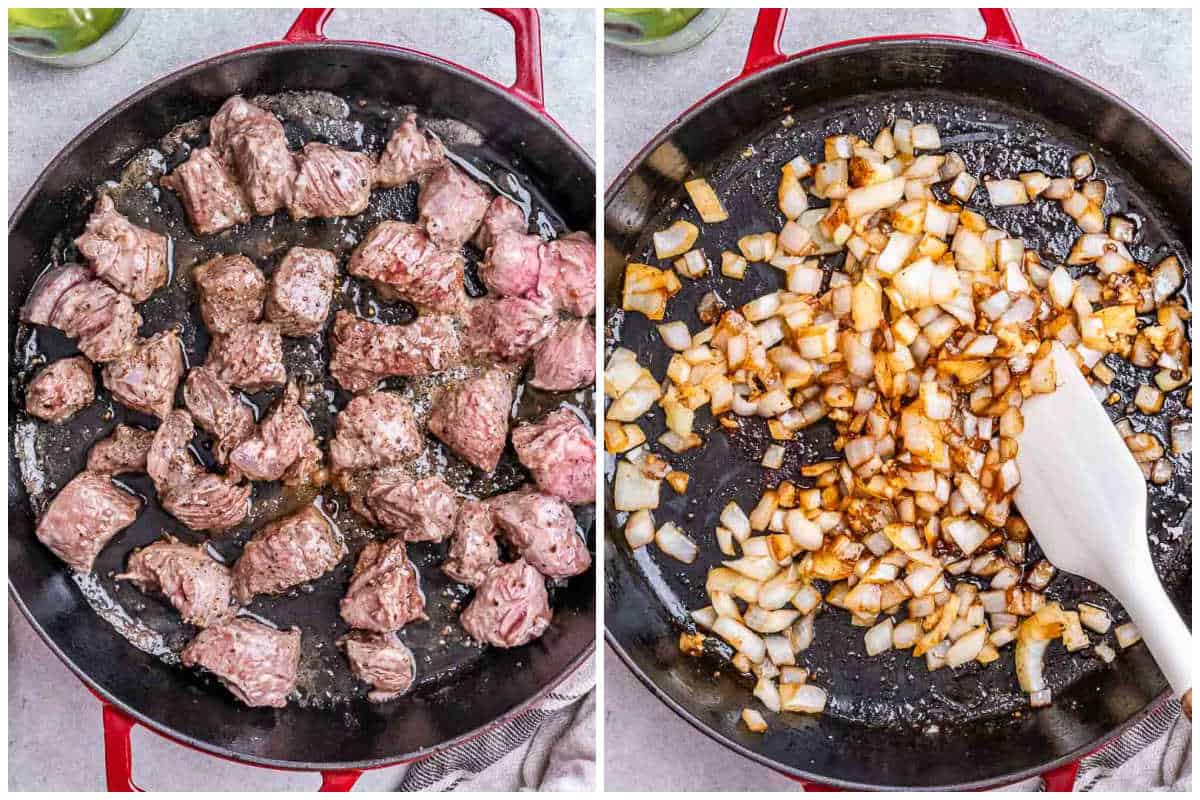
1️⃣ Season and sear the beef
Trim the excess fat from the beef chuck roast and cut it into 1/2-inch chunks. Season with salt and pepper, then sear the chunks in a heavy-bottomed pan until browned on both sides. Remove from the pan and set aside.
✏️ It’s best to sear the beef chunks in two batches. This prevents the pan from being overcrowded, helping the beef to get a nice caramelised crust on it instead of just steaming.
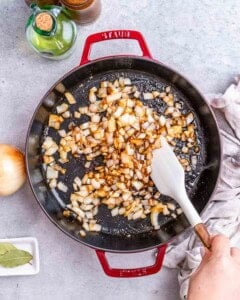
2️⃣ Saute the garlic and onions
Add the 4 minced garlic cloves and one large diced onion to the pan and saute until softened.
✏️ If the mix starts to catch on the bottom of the pan, add a splash of water.
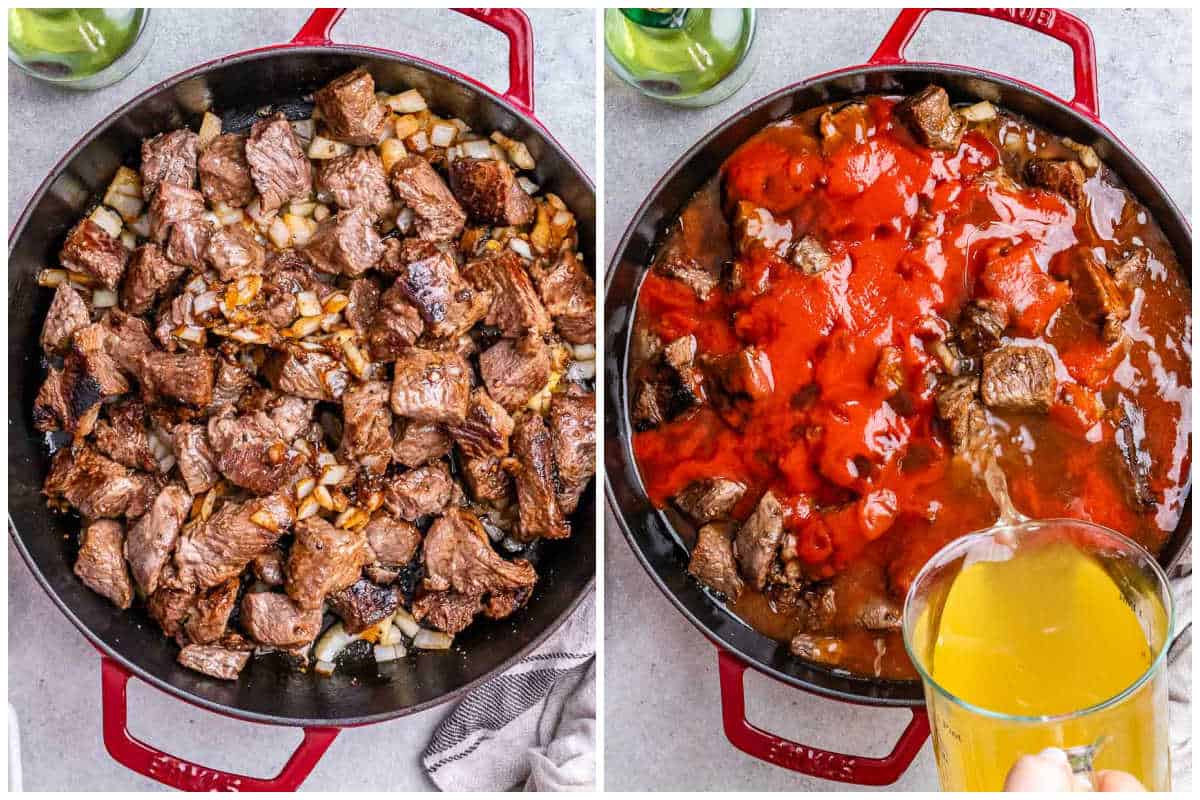
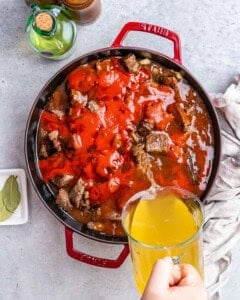
3️⃣ Add the remaining ingredients
Add the beef back into the pan along with the 1-2 teaspoons of chipotle powder, one can of enchilada sauce, one can of tomato puree, one tablespoon of Worcestershire sauce, 2 cups of beef stock, and bay leaves.
✏️ Use your cooking spoon to scrape up any crusty bits from the bottom of the pan so they can mix into the liquids (they’re full of flavor!).
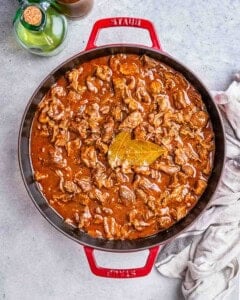
4️⃣ Leave to simmer
Partially cover the pan and leave to simmer for 3 1/2 hours until the beef is tender and falling apart. You’ll want to check on the mixture and give it a stir every half an hour to stop it catching on the bottom of the pan.
✏️ By partially covering the pan with a lid, this allows some of the liquid to evaporate off, thickening the sauce, but prevents it running dry. If you notice it’s getting too thick, you can add some extra broth or water to loosen it up.
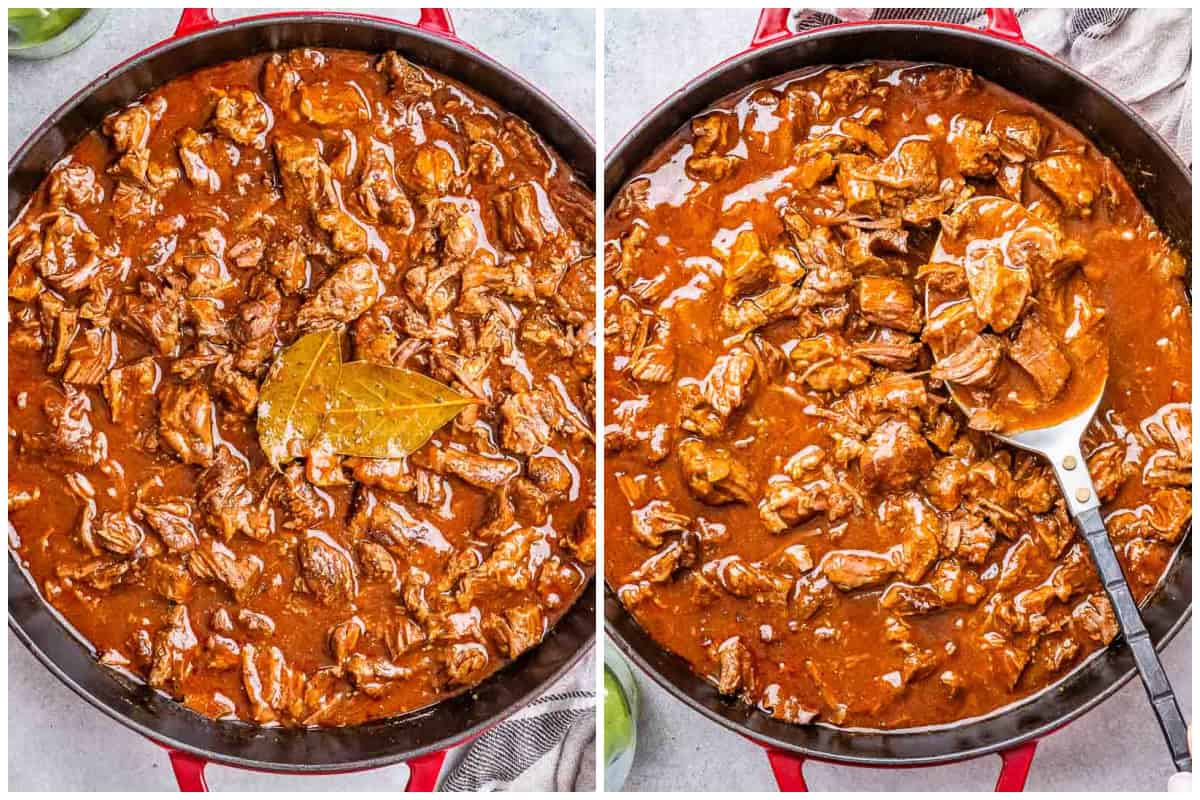
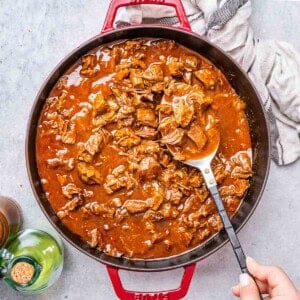
5️⃣ Shred the meat
Use two forks to gently shred the beef chunks into pieces.
✏️ If the beef isn’t easy to shred, leave it to simmer for another 10-15 minutes so it can soften more.
6️⃣ Serve
Dish up the chili and serve with your preferred toppings.
Texas Chili

Ingredients
- 4 pounds beef chuck roast trimmed of excess fat, cut into 1/2 inch chunks
- Kosher salt and black pepper, to taste
- 4 tablespoons olive oil, divided
- 1 large yellow onion, diced
- 4 cloves garlic, minced
- 1-2 teaspoons chipotle powder, to taste
- 14.5 ounces mild enchilada sauce, one can, tex-mex style
- 14.5 ounces tomato puree, one can
- 1 tablespoon Worcestershire sauce
- 2 cups beef stock or broth
- 2 bay leaves
- Optional: Shredded cheddar cheese, sliced green onions, lemon wedges
Instructions
- Season the 4 pounds beef chuck roast trimmed of excess fat (cut into 1/2-inch chunks) with Kosher salt and black pepper.
- Heat 2 tbsp of olive oil ( from the 4 tablespoons olive oil) in a rimmed heavy-bottom pan over medium-high heat. Add the meat in 2 batches, to not overcrowd the pan, and cook until browned on both sides. Set aside. Repeat with the remaining 2 tbsp olive oil and the second batch of meat.

- Once all the meat is done searing, reduce the heat to medium. Sauté the 1 large yellow onion (diced) and 4 cloves garlic (minced) for 3-4 minutes. If you see it catches the bottom of the skillet, add a couple of tablespoons of water.
- Return the browned beef to the skillet and stir in the 1-2 teaspoons chipotle powder. Add the 14.5 ounces mild enchilada sauce, 14.5 ounces tomato puree, 1 tablespoon Worcestershire sauce, 2 cups beef stock or broth, and 2 bay leaves and stir to combine. Make sure you stir all the way through the bottom of the pan.
- Partially cover the skillet and reduce the heat to low. Simmer for around 3 and a half hours, until the meat is super tender. Check every half an hour and stir through the pan. If the chili becomes too thick, you can add some more stock, as needed.
- When done, use 2 forks and gently pull apart the pieces to better integrate into the chili and get thicker.

- Serve with shredded cheddar cheese and green onions, if desired.


Notes
Tips:
- As this recipe takes a few hours to simmer, make sure you give yourself enough time to make it that day so that you can ensure the beef is falling apart by the time you come to shred it. Better yet, make it ahead of time – the chili tastes even better after it has sat in the fridge overnight!
- Searing the beef chunks in batches is key to getting a nice golden crust on the meat. If you overcrowd the pan when doing this, the beef will steam and won’t get such a deep flavor into the chili.
- While the chili is simmering, you can add a bit more liquid (water or broth) if you notice it’s looking a bit too dry. It’s important for there to be enough liquid in the pot so that the meat can cook properly.
- Choose a large, heavy-bottomed pot for this recipe so that it evens out the heat and stops the stew from catching and burning as it simmers.
Substitutions:
- No beef stock? You can use chicken stock or broth instead for a lighter flavor.
- No beef chuck? You could use an equal quantity of brisket instead
Storage Tips:
- Fridge: Allow the chili to cool completely, then transfer to an airtight container. Chill in the fridge for up to 3 days.
- Freezer: Allow the chili to cool completely, then transfer to an airtight container. Freeze for up to 3 months.
- Reheat: You can microwave the chilli in an uncovered, microwave-safe container in bursts until piping hot throughout. Otherwise, heat gently in a pot on the stove, stirring often, until piping hot.
Nutrition
Nutrition information is automatically calculated, so should only be used as an approximation.
Variations & Substitutions
→ No beef stock? You can use chicken stock or broth instead for a lighter flavor.
→ No beef chuck? You could use an equal quantity of brisket instead.
Storage & Make Ahead Tips
Fridge: Allow the chili to cool completely, then transfer to an airtight container. Chill in the fridge for up to 3 days.
Freezer: Allow the chili to cool completely, then transfer to an airtight container. Freeze for up to 3 months.
Reheat: You can microwave the chilli in an uncovered, microwave-safe container in bursts until piping hot throughout. Otherwise, heat gently in a pot on the stove, stirring often, until piping hot.
More Chili Recipes
You May Also Like
- Crockpot Mac and Cheese
- Chili Mac and Cheese
- Slow Cooker Beef Stew
- Ground Beef Bowl
- Cottage Pie
- Slow Cooker Beef Pot Roast
Pin this now to find it later
Pin It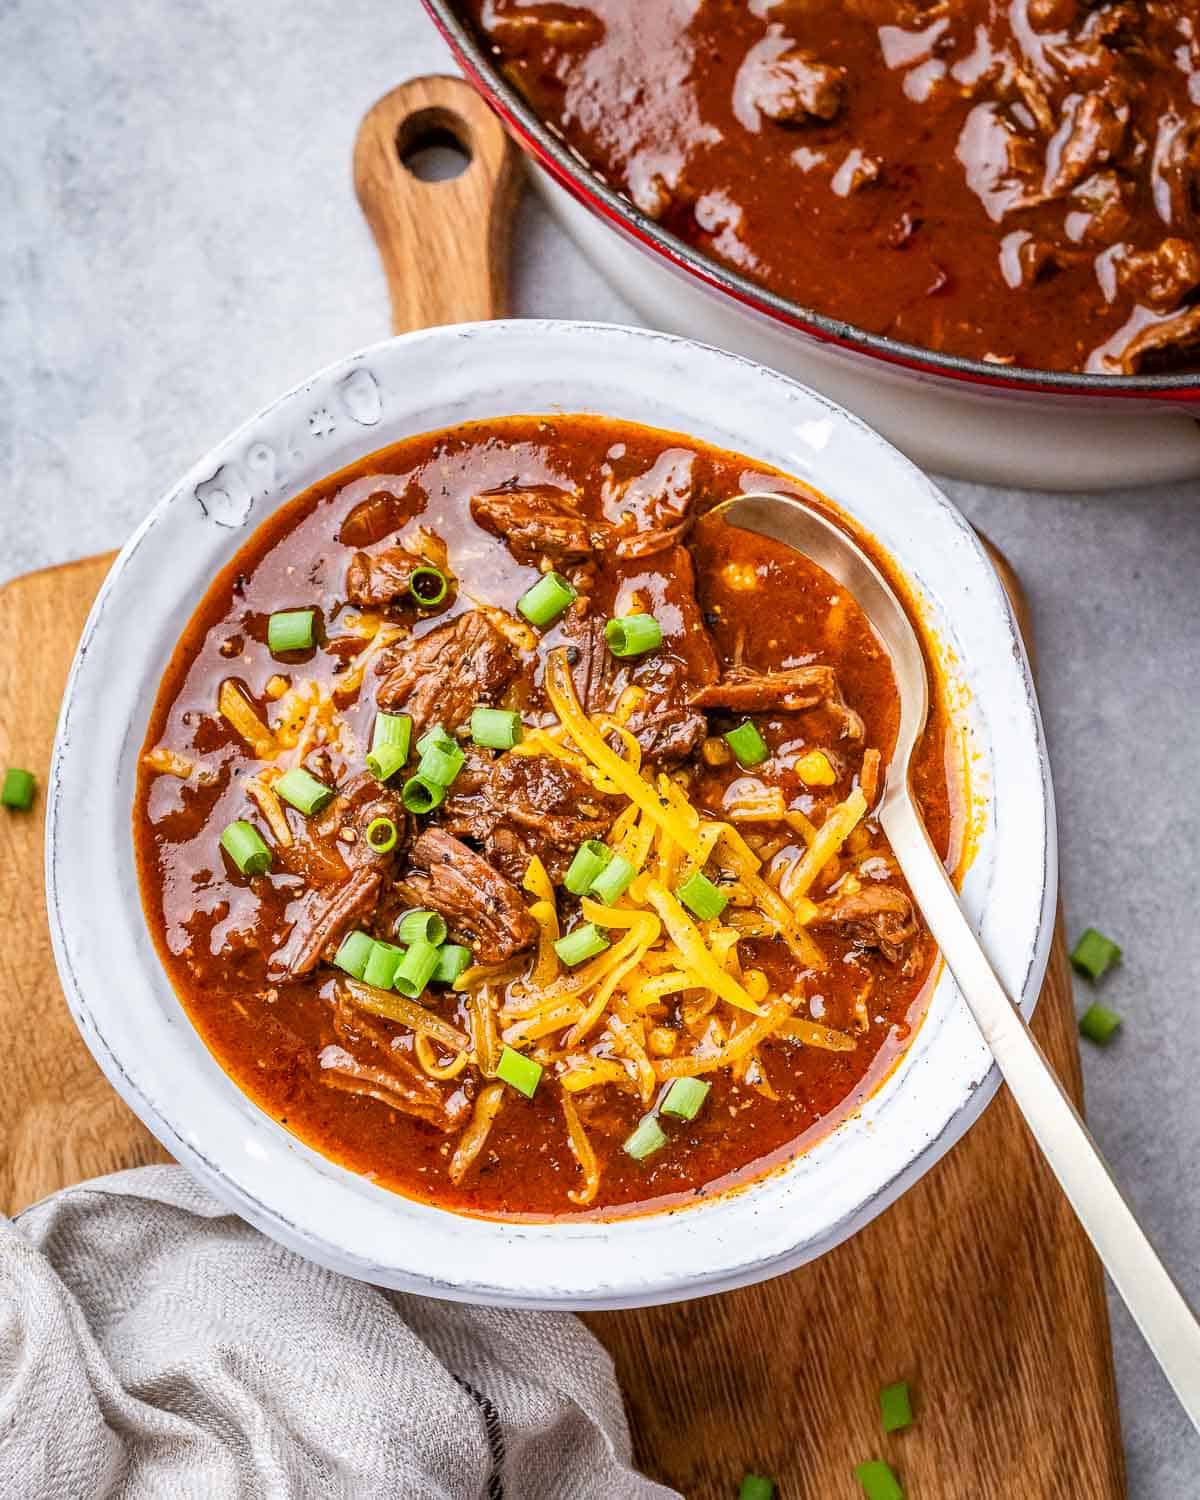


Ohhh my husbands favorite dish 😋