This post may contain affiliate links. Please read our disclosure policy.
Pickled turnips, a staple in Middle Eastern cuisine, are a fantastic addition to any mezze platter or sandwich. They get their beautiful pink hue and vibrant flavor from the combination of turnips, beets, and pickling brine. With just a few simple ingredients, you can enjoy these crunchy, tangy turnips straight from the jar or use them to elevate your favorite dishes.

This pickled turnips recipe is a must-try because it’s so easy and the flavor is incredible. The pickling process takes only a few minutes of hands-on time, but the result is a jar of crisp and flavorful pickles.
For some of you who don’t know, I am Lebanese, and as a Lebanese, this is a staple that’s always in our fridge. We eat it with everything. They are perfect to add to Middle Eastern staples like chicken shawarma bowls, grilled beef shawarma bowls, or any pita wraps. I also love them as a bright, crunchy topping for salads or as a snack throughout the day.
Why I love Pickled Turnips!

I grew up snacking on turnips and adding them to almost every meal. Whether we were having chicken shish tawook, beef kafta, or just making shawarma sandwiches and bowls like this beef shawarma bowl, they were always on the table, ready to go. It’s the one thing you can always count on getting at any Middle Eastern restaurant or in your bag of takeout.
Some of its highlights are:
- A Tangy, Delicious Flavor: The mix of vinegar, herbs, and beets gives the turnips a tangy and slightly sweet flavor you’ll love.
- Pretty Pink Color: Adding beets turns the turnips a nice pink shade that looks great on plates and platters.
- Easy to Make: With just a few basic ingredients and quick prep, you can easily make these pickles at home.
- Customizable: You can switch up the fresh herbs and spices or add a kick of heat from chili peppers if you want to change the flavors.
Ingredients for Pickled Turnips
Here are the ingredients you’ll need for these delicious pickled turnips:

- Turnips: Look for fresh, firm turnips to pickle. You’ll need about 2 lbs of peeled and cut into 1/2-inch thick sticks or batons.
- Red Beets: Adding one small peeled and diced beet gives the turnips a beautiful pink color.
- Vinegar: White distilled vinegar provides the acid for pickling the turnips.
- Water and Salt
- Sugar: A little sugar balances out the tartness of the vinegar. Use white or cane sugar.
- Bay Leaves: Adding a bay leaf to each jar gives the brine an extra layer of flavor.
Recipe Overview
How to make Pickled Turnips
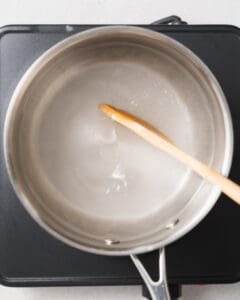
- Make the pickling brine: In a medium saucepan, combine the white vinegar, water, kosher salt, and sugar. Bring the mixture to a boil over medium-high heat, stirring frequently until the salt and sugar fully dissolve, about 2-3 minutes. Set aside to cool
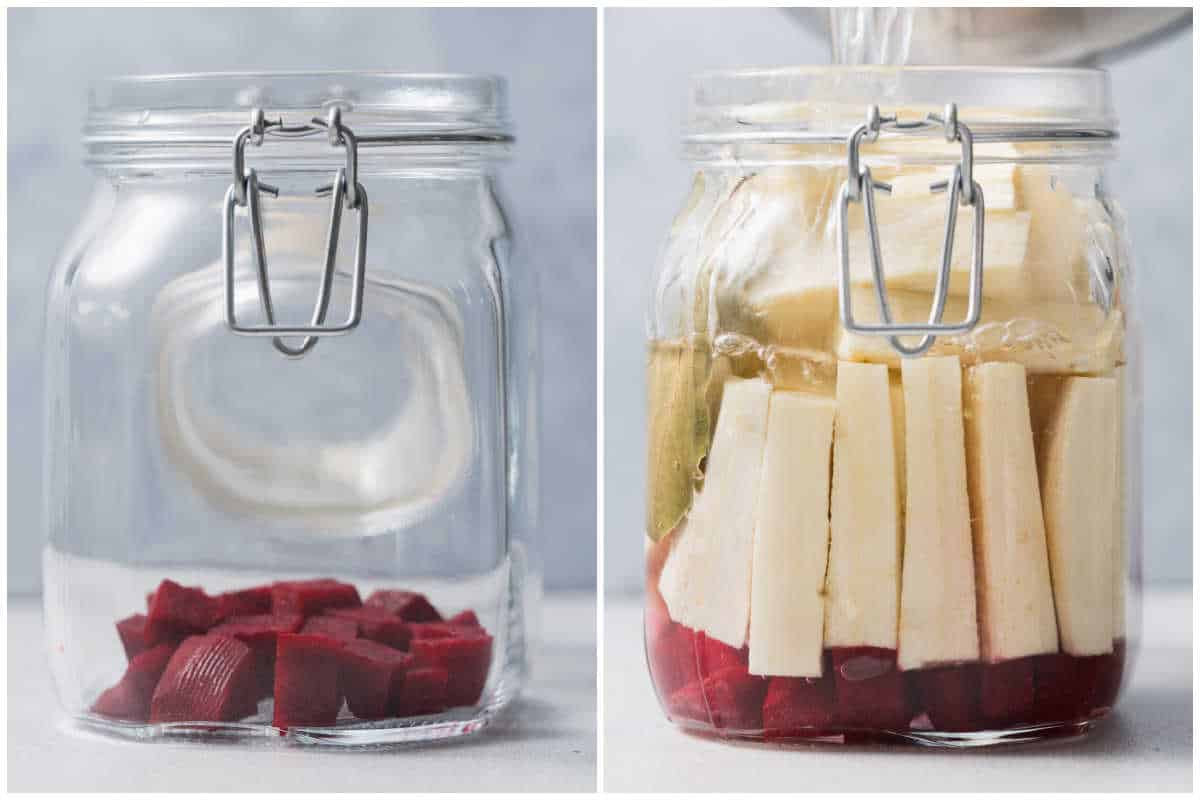
- Prepare the jars: Add the turnip batons and diced beet pieces to the jars, dividing evenly between the two. Place one bay leaf in each jar.

- Pour brine over turnips: Carefully pour the hot vinegar brine over the turnips and beets in the jars, ensuring they are completely submerged. Leave about 1/2 inch of headspace at the top.
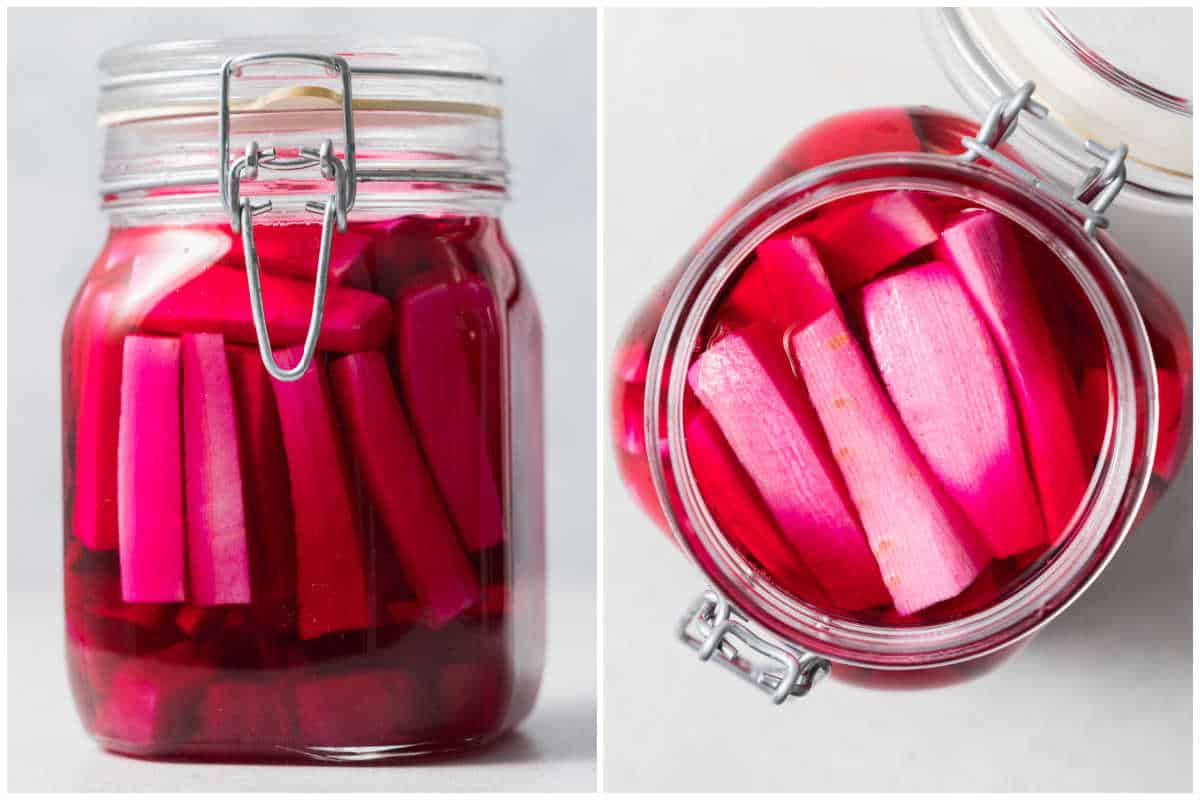
- Cool and pickle: Allow the jars to cool to room temperature, about 1 hour. Once cooled, firmly secure the lids on the jars.
- Pickle the turnips: Let the sealed jars of pickled turnips sit at room temperature for 5 days to allow the pickling process to finish and the flavors to develop.
- Refrigerate and enjoy: After 5 days, transfer the jars to the refrigerator. The pickled turnips will keep for up to 4 weeks refrigerated. For best flavor, allow 24 hours of refrigeration before eating.
Recipe Notes and Tips
- Use pickling or kosher salt, not regular table salt. Table salt can make the brine cloudy.
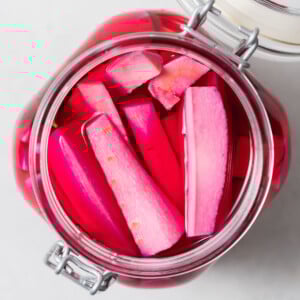
- For a beautiful pop of pink color, be sure to include the beet pieces. The beets give the turnips their lovely rosy hue.
- Feel free to experiment with fresh herbs like dill, thyme, or rosemary for extra flavor in the pickling brine.
- If you want a kick of heat, add a slice or two of jalapeño or other chili peppers to the jars.
- For crunchier pickled turnips, let the brine cool slightly before pouring it over the turnips in the jars. Overly hot brine can cause them to soften.
- These pickles are meant for short-term storage, up to 4 weeks.
How to store
These refrigerator-pickled turnips should keep very well when properly stored. Here are some tips for storing:
- Refrigerate: Once the turnips have fully pickled after 5-7 days at room temperature, seal the jars and refrigerate. They will keep for up to 4 weeks in the refrigerator.
- Freeze: I do not recommend freezing because it will change the texture of the pickled turnips once thawed. To store for a longer period, I recommend the canning method. Pour the hot brine into your clean jars, making sure the turnips are completely covered while leaving about a half-inch of space at the top. Secure the lids and place the jars in a pot of boiling water for 10 minutes. Once finished, carefully remove the jars and let them sit still for 24 hours. You can store them in a cool, dark place for up to a year, but for the best flavor and crunch, try to use them within 6 months.

Common Questions
Absolutely! Feel free to add sliced radishes, carrots, or even cauliflower to the jars along with the turnips and beets. Just be sure not to pack the jars too tightly.
White distilled vinegar works best, but apple cider vinegar can be substituted in a pinch. Avoid very strong vinegars, such as malt vinegar.
No, there’s no need to fully can or process the jars for a water bath. Just be sure to refrigerate them for 5 days after pickling.
No, you do not have to. The beet roots will give it a nice pink color, but if you don’t mind that the turnips stay white when pickled, you can omit them.
More How To Recipes
Also, if you try a recipe and like it, leave me some feedback in the comments below, and don’t forget to rate it! Share it with friends and family on social media.
FOLLOW me on FACEBOOK | INSTAGRAM | PINTEREST | TWITTER for all of my latest blog posts and recipes.
Homemade Pickled Turnips

Ingredients
- 1 cup white distilled vinegar
- 3 cups water
- 3 tablespoons kosher salt, not table salt
- 2 tablespoons sugar
- 2 bay leaves
- 2 pounds turnips, or 2 large turnips peeled and cut into ½-inch thick batons
- 1 small beet, peeled and diced
Instructions
- Place a medium saucepan over medium-high heat. Add the 3 cups water, 1 cup white distilled vinegar, 3 tablespoons kosher salt, and 2 tablespoons sugar. Stir well to combine, then heat it until it just starts to boil. About 2-3 minutes.

- Remove from the heat and let it cool for a few minutes.
- Add the 2 pounds turnips (cut into thick batons) and 1 small beet (diced) into the mason jars along with 2 bay leaves (one in each jar).
- Divide the hot vinegar water into the mason jars until the turnips are all covered to the top.
- Set aside and allow it to cool completely. Cover the jars with the lids and let them sit in a cool, dry area at room temperature for 5 days.
- When cool, seal the glass jar tightly and let it sit at room temperature on your kitchen counter or in the fridge for 5 days. It will need 5 days before it’s ready to serve.


Notes
- Jars: You’ll need two 32-oz mason jars with tight-fitting lids to pack the pickled turnips in.
- Storage: If you leave the turnips to pickle for 5-7 days on the kitchen counter, store them in the fridge after opening.
- Beets: This will add color and make your turnips pink.
- You may skip step one and just add salt, sugar, and vinegar into 3 cups of hot water and stir until everything is dissolved, and then move on to step 2.
- Do use kosher salt and not table salt
- The Jar Pickled Turnips in its brine will last up to 4 weeks in the fridge.
Nutrition
Nutrition information is automatically calculated, so should only be used as an approximation.