This post may contain affiliate links. Please read our disclosure policy.
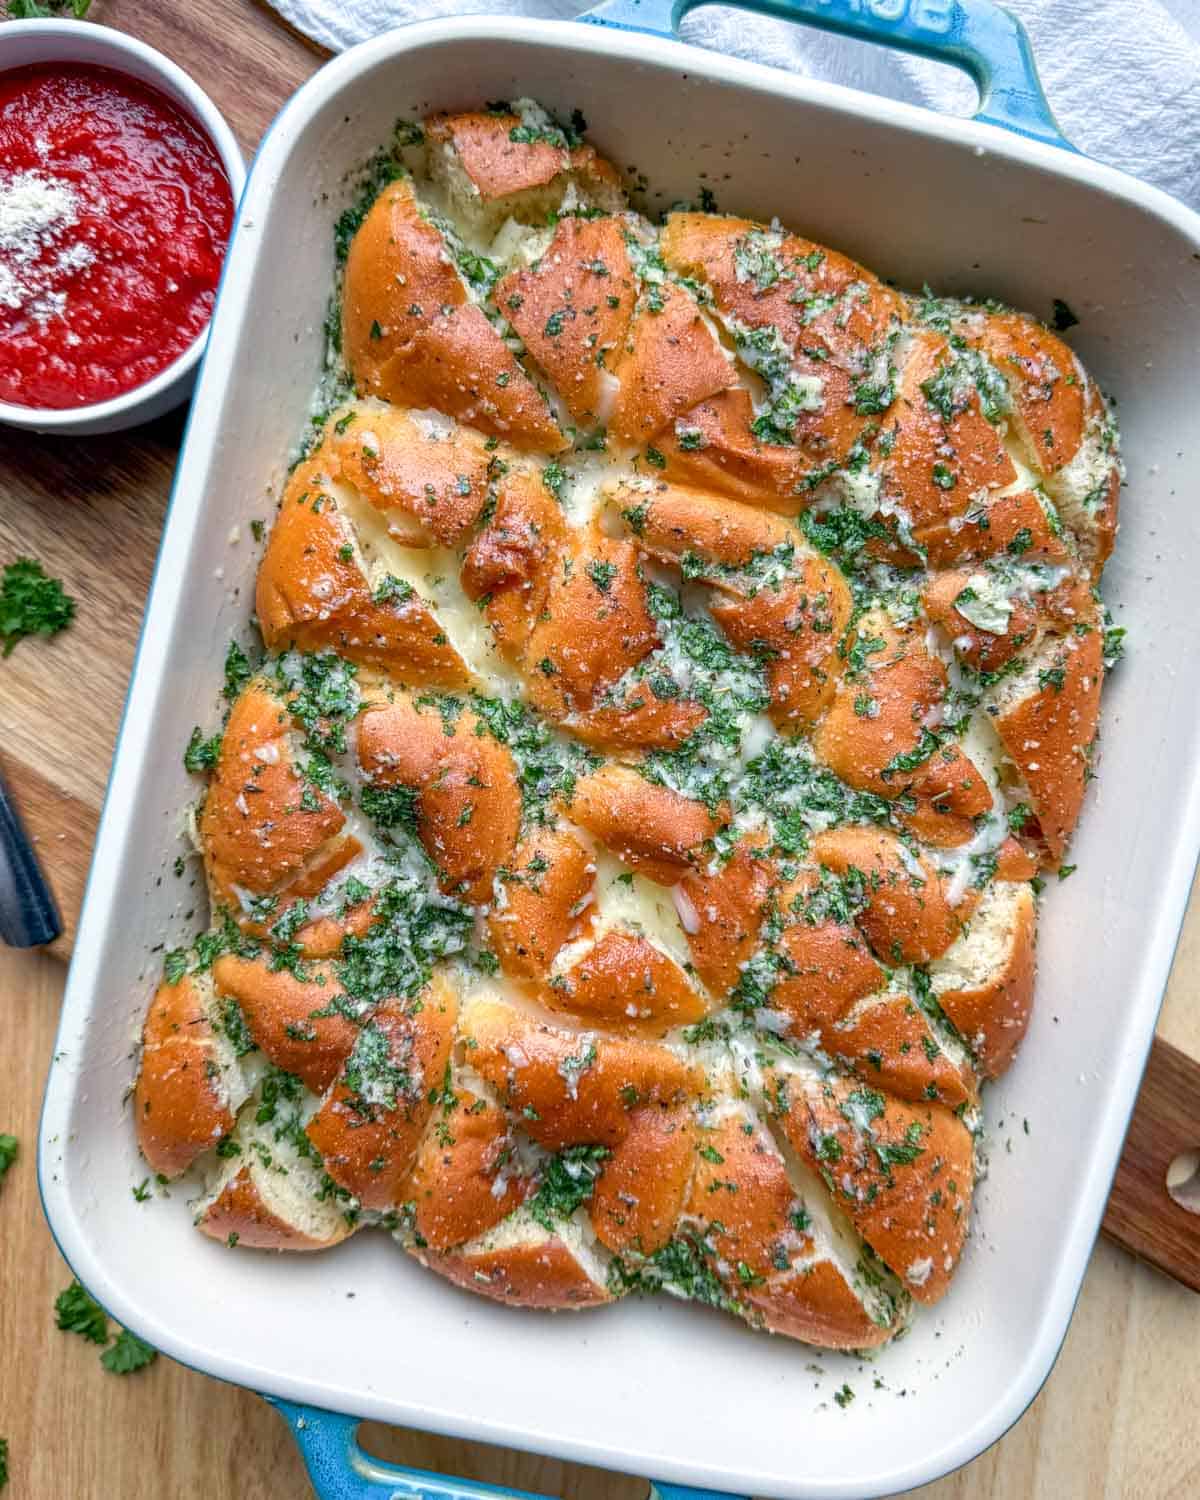
A quick and easy way to make some garlic bread in a pinch during the holidays is to make this Hawaiian Roll Garlic Bread recipe. You will have garlic dinner rolls ready and on the table in just 15 minutes.
If you do not want to make homemade dinner rolls from scratch, using Hawaiian rolls are your starter is such a great idea, especially during the holidays when you have to make 10 other things. They are just so quick and simple to make and can be ready in less than 20 minutes.
These garlic butter Hawaiian bread rolls will be a huge success at any gathering, and everyone will want to know how you made them. The recipe can also be doubled easily to make a larger batch for a bigger crowd.
Recipe Overview
Ingredients needed
Below is a list of ingredients you will need to make these garlic Hawaiian rolls. Full measurements are listed further down in the recipe card.
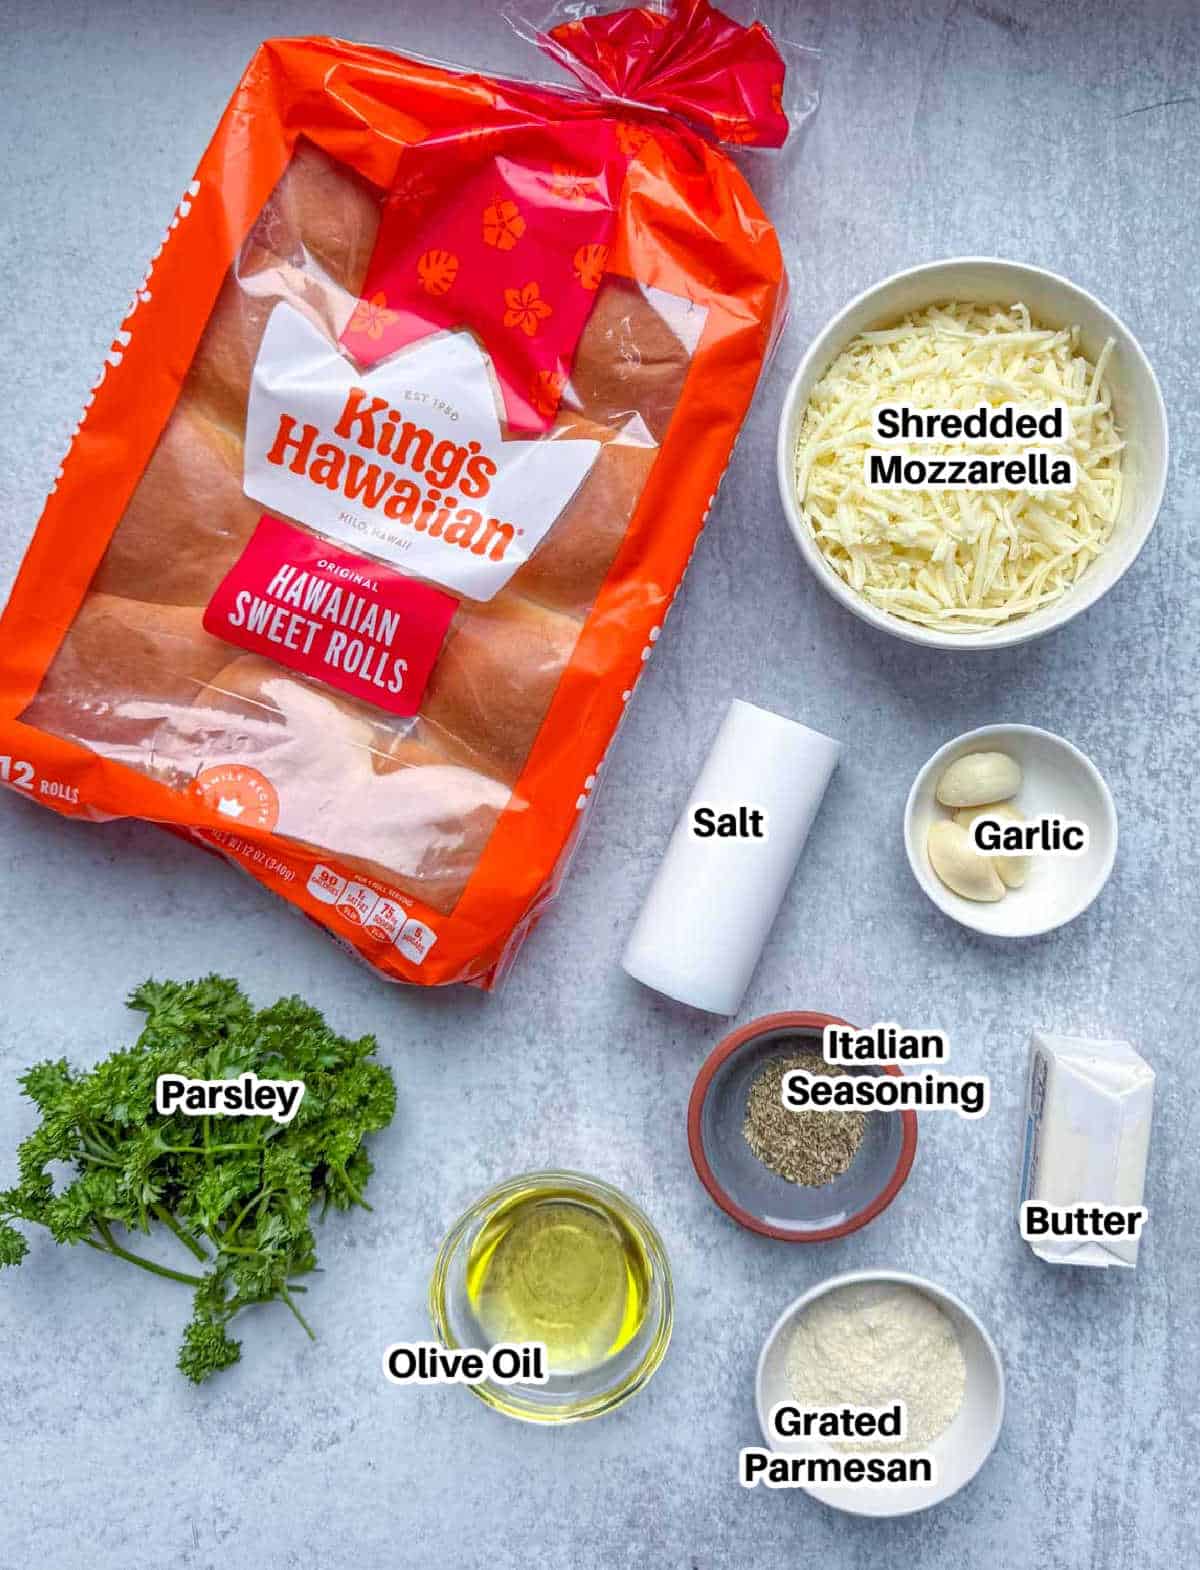
- 12 Hawaiian slider rolls: I used one pack of King’s Hawaiian sweet rolls. Any other options are fine to use. The savory rolls will work just as well here.
- Shredded Mozzarella cheese: You may shred your own or use store-bought. You may use a mix of two different types of melty cheese. You can use part-skim shredded mozzarella.
- Olive oil: Light works best here, or you can use avocado oil.
- Fresh garlic cloves: Fresh garlic will be much better than using garlic powder.
- Unsalted butter: If you use salted butter, skip adding salt.
- Dried Italian Seasoning: This will add a bit of flavor. You can swap with dried oregano.
- Fresh parsley, finely chopped: This also tastes great if you use fresh as opposed to dried.
- Salt: If watching your salt intake, skip it.
- Grated Parmesan cheese: Adds great flavor.
How to make Hawaiian Roll Garlic Bread
Preheat the oven to 350°F.
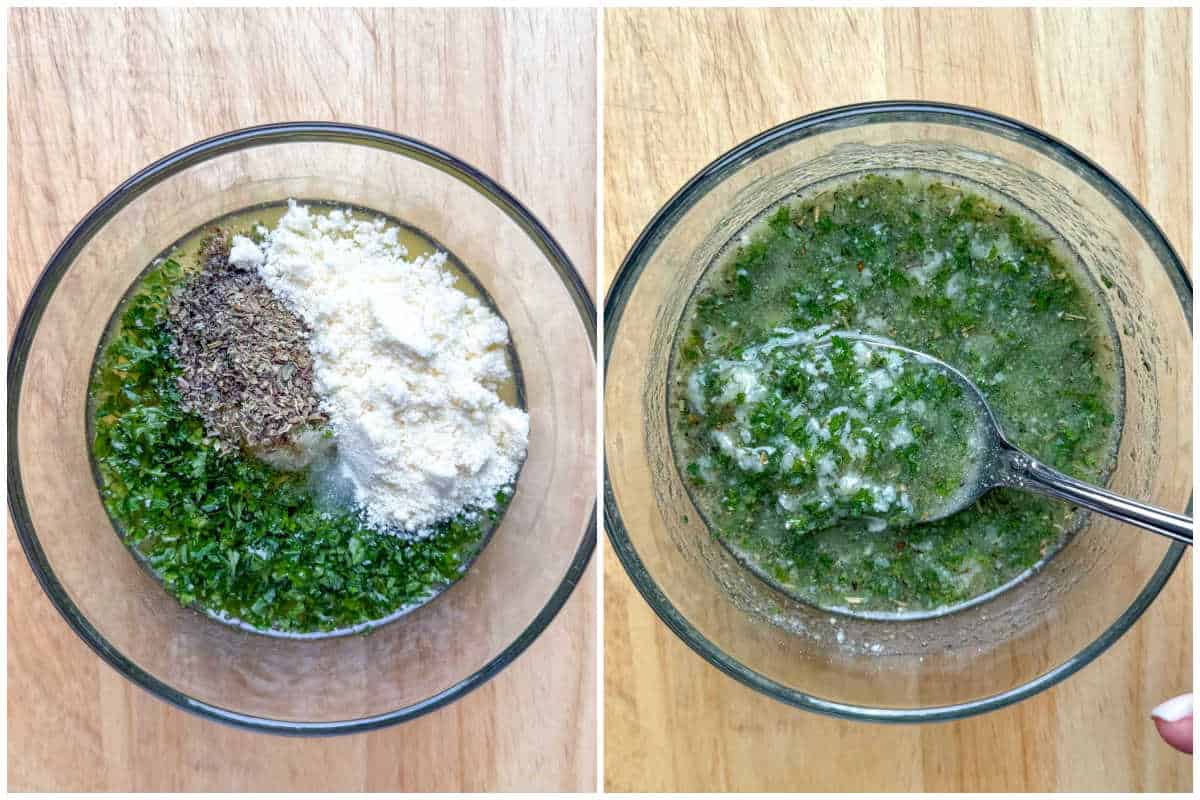
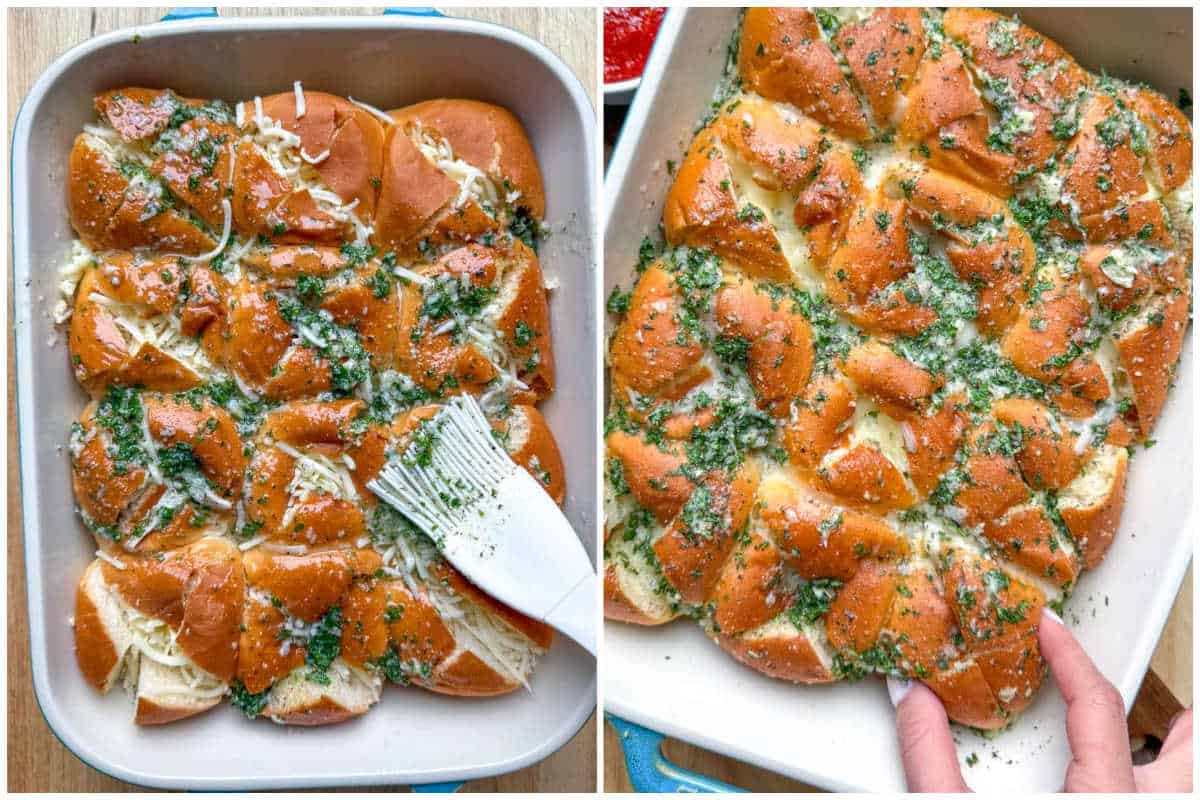
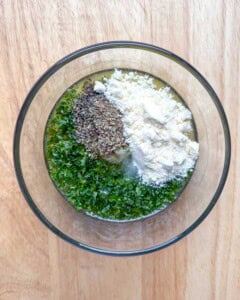
In a medium bowl, add the melted butter, olive oil, minced garlic, Italian seasoning, chopped parsley, grated parmesan cheese, and salt. Mix and set aside.
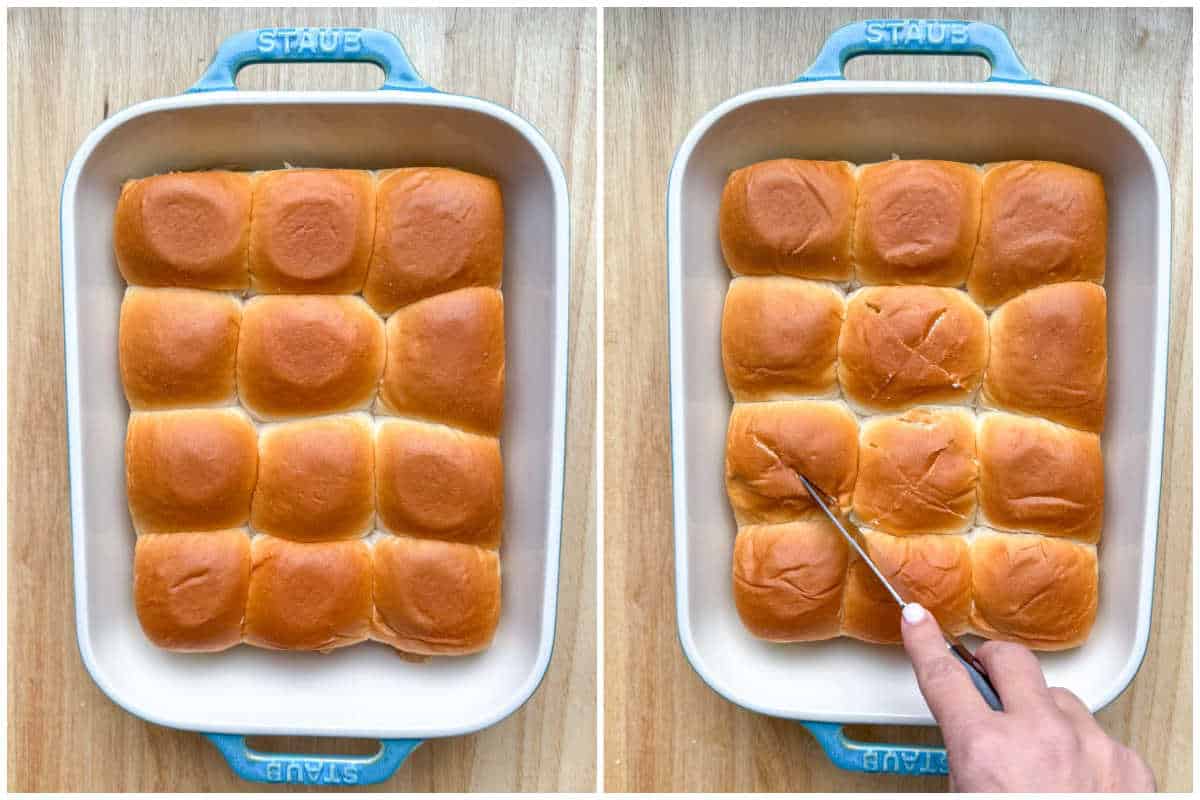
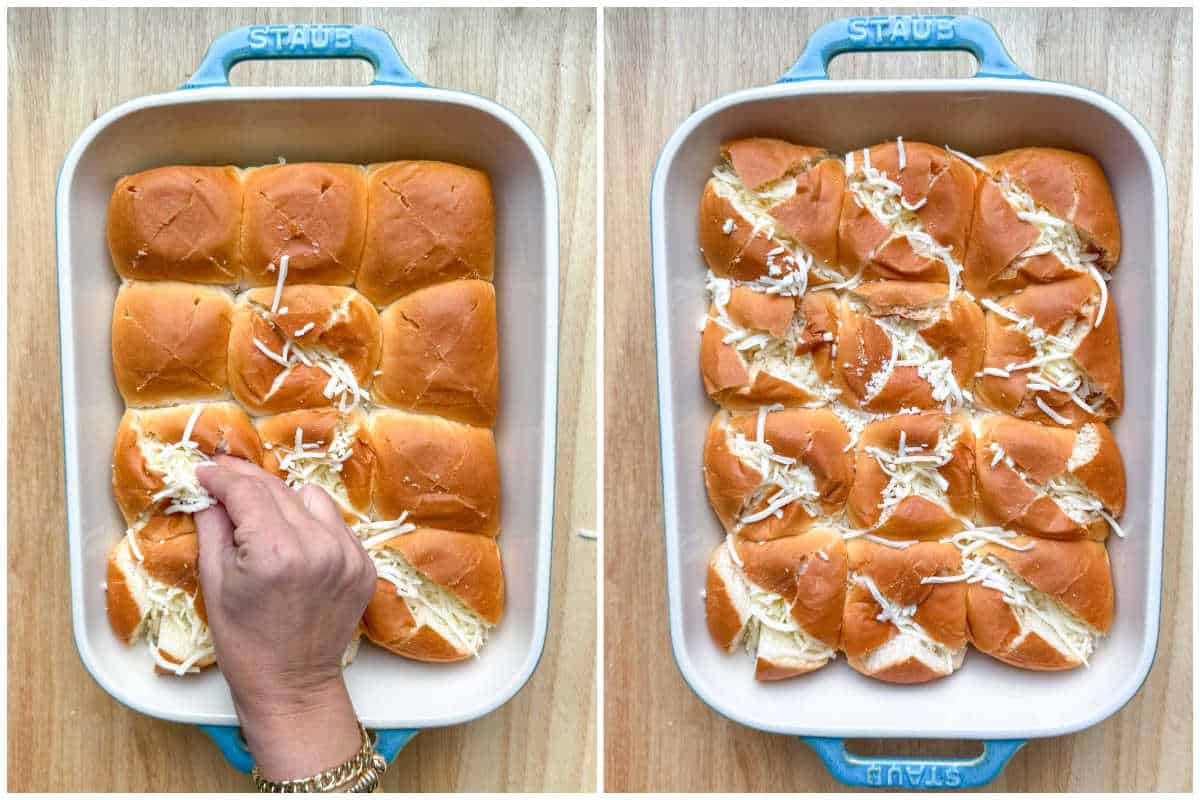
In a large 8.5 x 11 baking dish, place the Hawaiian bread rolls. Slightly pull them apart.
✏️ If you have a 9×11 or a 9×13 dish, it will work just fine.
Using a perforated knife, slice each roll to create an X, or you can slice each roll vertically twice.
✏️ Do not slice all the way to the bottom. You only need to make pockets in the middle to stuff it with cheese.
Stuff each roll with a handful of mozzarella cheese. About 2 tablespoons each.
✏️ Like cheese? You can always use more. Go ahead and add another half cup if you like.
Brush the garlic butter mixture all over the bread rolls.
✏️ You should have enough to spread it evenly over the whole dish. Try to get the sides as well. Use all of it.
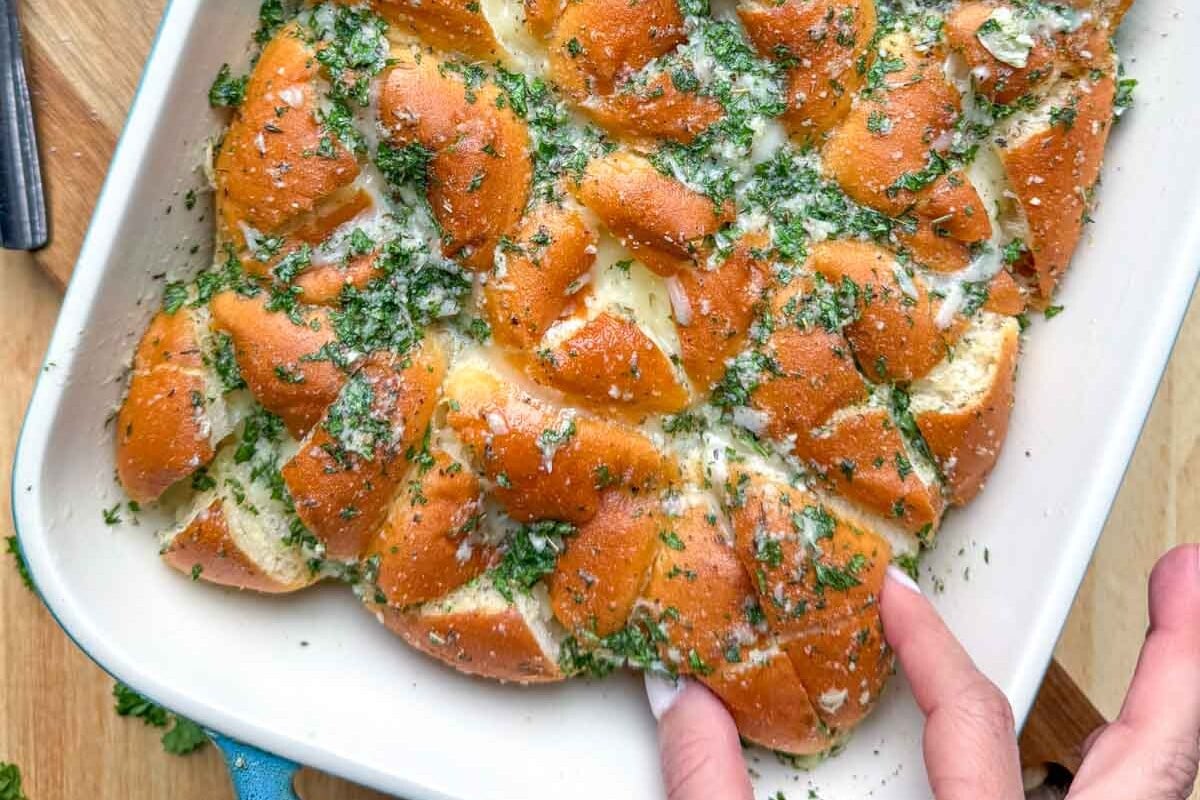
Bake for 7-8 minutes or until the bread rolls are golden brown and the cheese has melted.
✏️ After 8 minutes, it may start to get too brown. If you want to bake it more so the cheese is really melted, you can cover it for the last few minutes with a foil wrap.
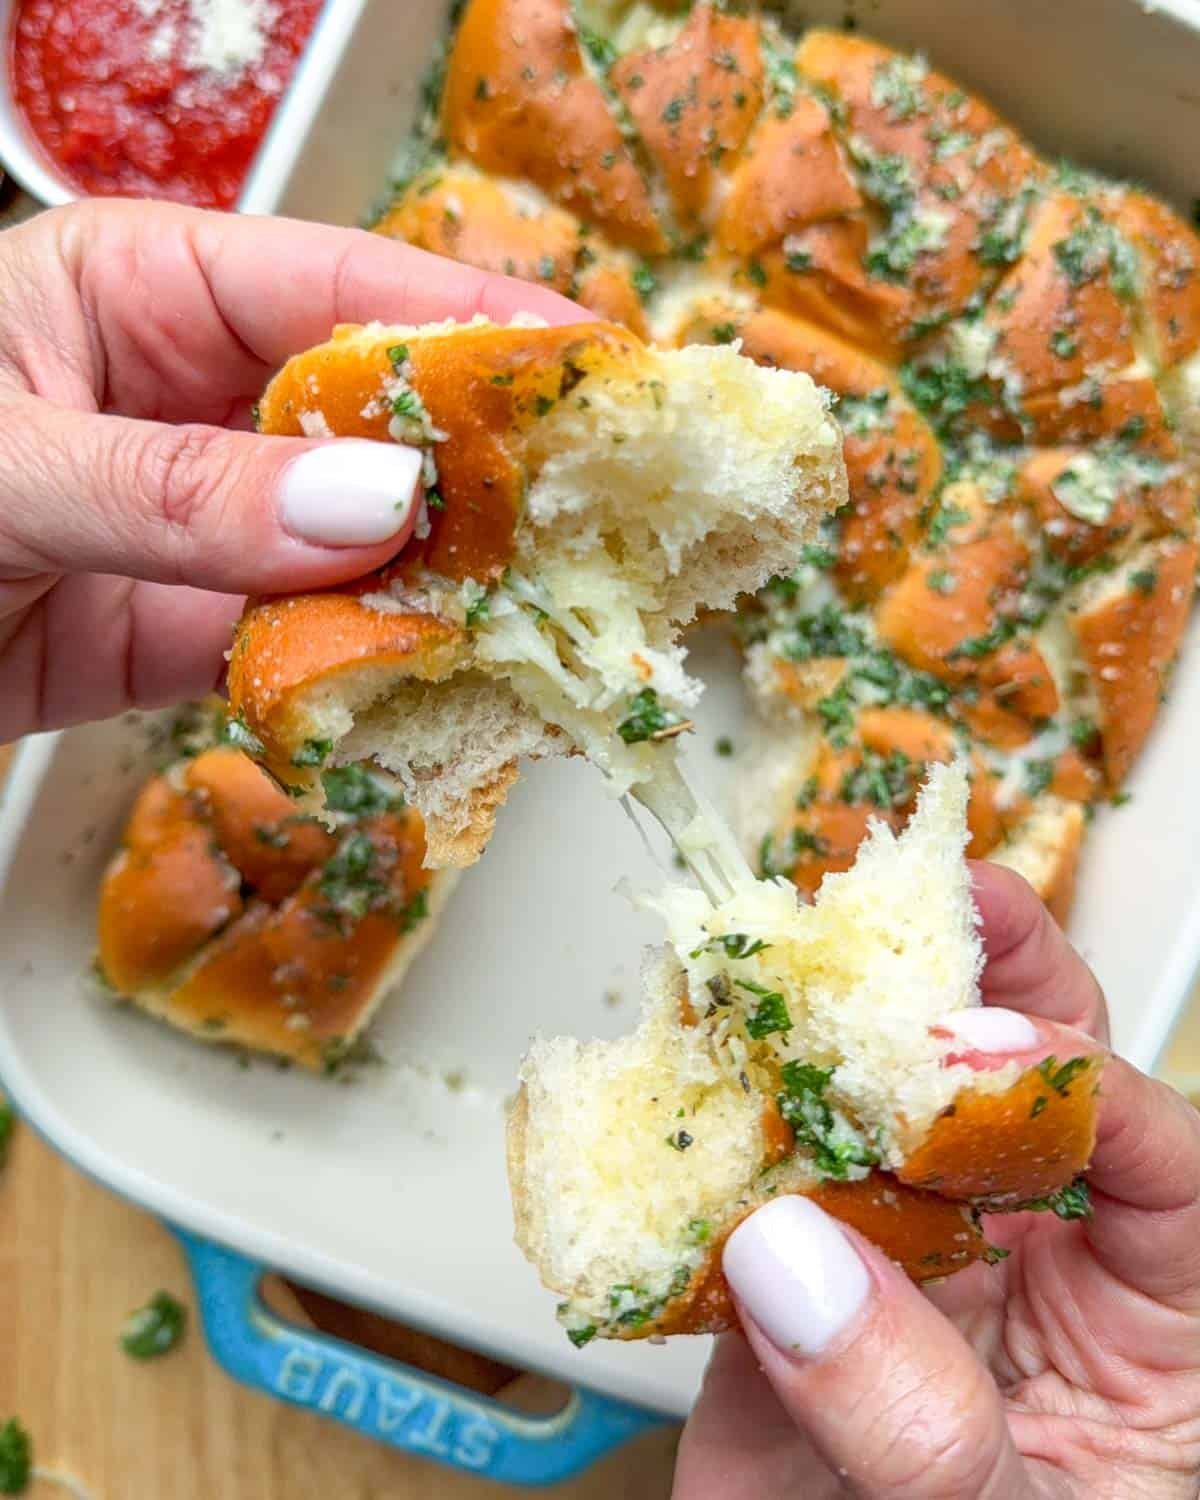
Serve and enjoy with your favorite dip or as a side dish with your dinner spread.
✏️ I usually serve with marinara or pizza sauce.
Notes and Tips
- For the bread rolls, you can use Sweet or savory. If you have a favorite kind of brand you prefer using, go right ahead.
- You can use less butter and more olive oil if preferred. There is not right or wrong here; it can easily be adjusted.
- Fresh garlic is a must. Garlic powder is just not as good for this recipe. Trust me, I tried when I didn’t have any fresh garlic on hand lol.
- Go with fresh parsley instead of dried parsley for the best flavor.
- Use a mixture of different cheeses if you like. A lot of times, I use 1/2 cup shredded mozzarella cheese and half-shredded white cheddar. Or even Gouda.
Common Questions
Yes. You can prep this garlic bread ahead of time up until before baking it. Cover and store until you are ready to bake. You can even prep it a couple of days ahead. Just make sure you store it in the fridge.
If you have leftovers, place them in a lidded container and store them in the fridge for up to 5 days.
I prefer reheating any leftovers in the microwave for 10-15 seconds. It just works great and is quicker than preheating an oven and using an oven to reheat it. Unless you made extra and have a whole dish of it, then I would pop it in a preheated oven for about 5 minutes.
You can freeze leftovers for up to 3 months. Thaw the night before before reheating in the microwave.
You may also like
- Tortilla Kebabs
- Ground Beef Butternut Squash Pasta
- Sweet Potato Cornbread
- Chicken Pot Pie Casserole
- Fruit and Cheese Platter
- Cheesy Garlic Bread
If you try a recipe and you like it, leave me some feedback in the comment section below, and don’t forget to rate it! I would love it if you shared it with friends and family.
FOLLOW me on FACEBOOK | INSTAGRAM | PINTEREST | TWITTER for all of my latest blog posts and recipes.
Hawaiian Roll Garlic Bread

Ingredients
- 12 Hawaiian sweet rolls, one packet, savory rolls work too
- 1 cup Shredded Mozzarella cheese, or other blends
- 3 tablespoons olive oil, or avocado oil
- 3 Fresh garlic cloves, minced
- 1/4 cup unsalted butter, melted
- 1 teaspoon dried Italian Seasoning
- 2 tablespoons fresh parsley, finely chopped
- 1/2 teaspoon salt
- 2 tablespoons grated Parmesan cheese
Instructions
- Preheat the oven to 350°F.
- In a medium bowl, add the melted 1/4 cup unsalted butter, 3 tablespoons olive oil, minced 3 Fresh garlic cloves, 1 teaspoon dried Italian Seasoning, chopped 2 tablespoons fresh parsley, 2 tablespoons grated Parmesan cheese, and 1/2 teaspoon salt. Mix and set aside.

- In a large 8×11 baking dish, place the 12 Hawaiian sweet rolls. Slightly pull them apart.
- Using a perforated knife, slice each roll to create an X, or you can slice each roll vertically twice. Do not slice all the way to the bottom.
- Stuff each roll with a handful of mozzarella cheese (from 1 cup Shredded Mozzarella cheese). About 2 tablespoons each. (you can always use more)
- Brush the garlic butter mixture all over the bread rolls. (Use all of it)
- Bake for 7-8 minutes or until the bread rolls are golden brown and the cheese has melted.
- Serve and enjoy with your favorite dip or as a side dish with your dinner spread.


Notes
- Sweet or savory Hawaiian Rolls work here.
- You can use less butter and more olive oil if preferred.
- Fresh garlic is a must. Garlic powder is not as good.
- Go with fresh parsley instead of dried parsley for the best flavor.
- Use a mixture of different cheeses if you like. A lot of times, I use 1/2 cup shredded mozzarella cheese and half-shredded white cheddar. Or even Gouda.
Nutrition
Nutrition information is automatically calculated, so should only be used as an approximation.
Can this be made ahead of time and placed in the oven later ?
Yes absolutely!
Hi Rena, what a great idea using the Hawaiian Rolls for this recipe, very economical. Our family has Hawaiian Rolls many times with dinners. Also, thank you for your Thanksgiving Catalog. It provides a great variety of recipes and ideas. Love your ideas, thanks again.
Thank you, Don. We love Hawaiian rolls as well, and I am glad this was a great idea for everyone. I am glad you loved the Thanksgiving guide. You are very welcome.
Thank you. It was so delicious.
Oh my God your recipe was so good 😊